PERMANENT COURSES
READY TO TRY ORIENTEERING?
Cascade Orienteering Club hosts orienteering meets year-round in Washington State. These meets are open to all and being a member or experienced is not required. Newcomers are welcome to show up, talk to the beginner instructor for a few minutes, then jump right into orienteering. However, some people may want more preparation. That’s where permanent courses come in!
Permanent courses offer an opportunity to try orienteering at your leisure, either on your own or with friends and family, before attending an event. It’s also an easily planned outdoor activity for a Scout troop, youth group, or any organization that wants to enjoy time outdoors.
Where are permanent courses?
What is a permanent course?
How do I do a permanent course?
How do I navigate?
What next?
Where are permanent courses?
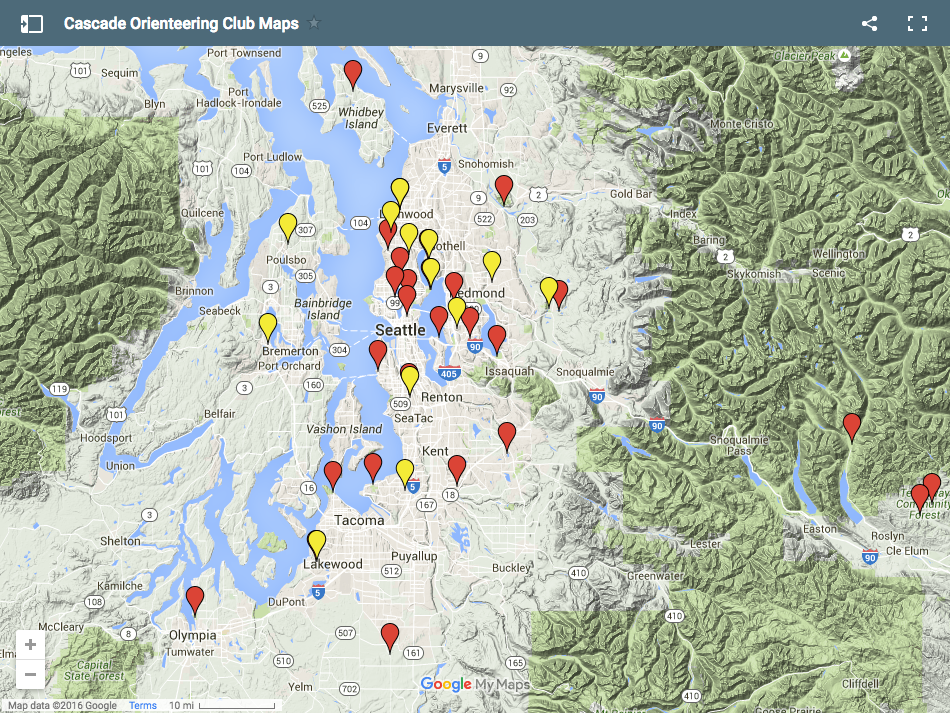
You can find a permanent course near you by visiting the Map of Maps page, where all permanent courses are marked by a yellow pin. Click the pin to find a link to that venue’s map page, where you’ll find a map and control description to print or view on your smart phone.
Permanent course venues are also listed by sub-region in the sidebar to the right (or at the bottom of the page on mobile).
Meanwhile, to learn more about how permanent courses work, read on!
What is a permanent course?
A permanent course can be a beginner to intermediate level orienteering course that can be done anytime. A regular orienteering meet uses orange and white flags that are present just for a day, but a permanent course features wooden posts or signs that remain in the venue year-round.
How do I do a permanent course?
First, you need to find a permanent course venue near you. You can do that by visiting the Map of Maps page or browsing the venue list in the sidebar (at the bottom of the page on mobile). Either way, you will be directed to the venue’s map page where you can print a map and control description. Once you’ve done that, here’s what to do next:
- The map will have many circles marked on it; these are the controls. You can create a course for yourself by drawing lines between the the circles, to determine which order you’ll find them. You do not need to travel on the line. The line simply helps you see which control to find next.
- You can either draw your own course onto the map, or do one of the suggested courses from the control description PDF.
- The control description helps you confirm that you’ve found the right control. More information on how to read them is in the control description PDF.
Great, you’ve printed the map and control description, and drawn a course. Now it’s time to orienteer!
- Begin your course at the magenta triangle on the map
- Navigate to each control in the order you’ve chosen
- When you get to the center of each circle, there will be a wooden post or sign painted with an orienteering symbol. The post will have both a number and a letter. If the number on the post matches the number on the map and in the control description, then you’ve found the control you’re looking for!
- The letter is not printed on the map or the control description. Instead, if you are doing this course with a group or a coach, write down the letter you see on a piece of paper as evidence that you found the control.
- When you’ve found all the controls, return to the finish, which is marked by two concentric circles, and may be printed on top of the start triangle if the start and finish are in the same place.
That’s it, you did it!
How do I navigate?
Before using a compass, there are two very important skills to establish:
1) ORIENT THE MAP
Maps aren’t meant to be held like books, with north always at the top. Instead, orient the map to match the terrain. You can do this by simply observing what you see. If you see a lake in front of you, then turn the map so that lake is in front of you on the map as well.
As your orienteering improves, you can orient your map with a compass as well. To do this, turn your map so that the blue magnetic north lines are parallel and run the same direction as the floating needle in your compass. That’s it!
2) THUMB THE MAP
Find your location on the map and put your thumb there. It seems simple, but it’s very important. As you move along the park, update your thumb as you go. See an intersection? Update your thumb. See a big bend in the trail? Update your thumb. You should fold your map smaller so that your thumb is always on your location.
3) CHOOSE A ROUTE
While advanced orienteers do use a compass to orient their map and occasionally to shoot bearings, a lot of orienteering relies reading the map and choosing a route. Look at the checkpoint that you are going to find. What looks like the most efficient route? Or, what route do you think you can confidently execute? What features will you see along the way? A big grassy field, or bend in the trail? Keep an eye out for these features as you go, keep your map oriented, and keep updating your thumb… then you’ll be orienteering!
Want to learn more? Visit the Skills page!
What next?
Did you enjoy the course? Great!
- Check out the Events page and come out to a meet!
- The Newcomers page will help you learn what to expect.
- Once you’ve had some experience, the Skills page can help you improve.
Welcome to orienteering!
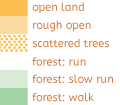
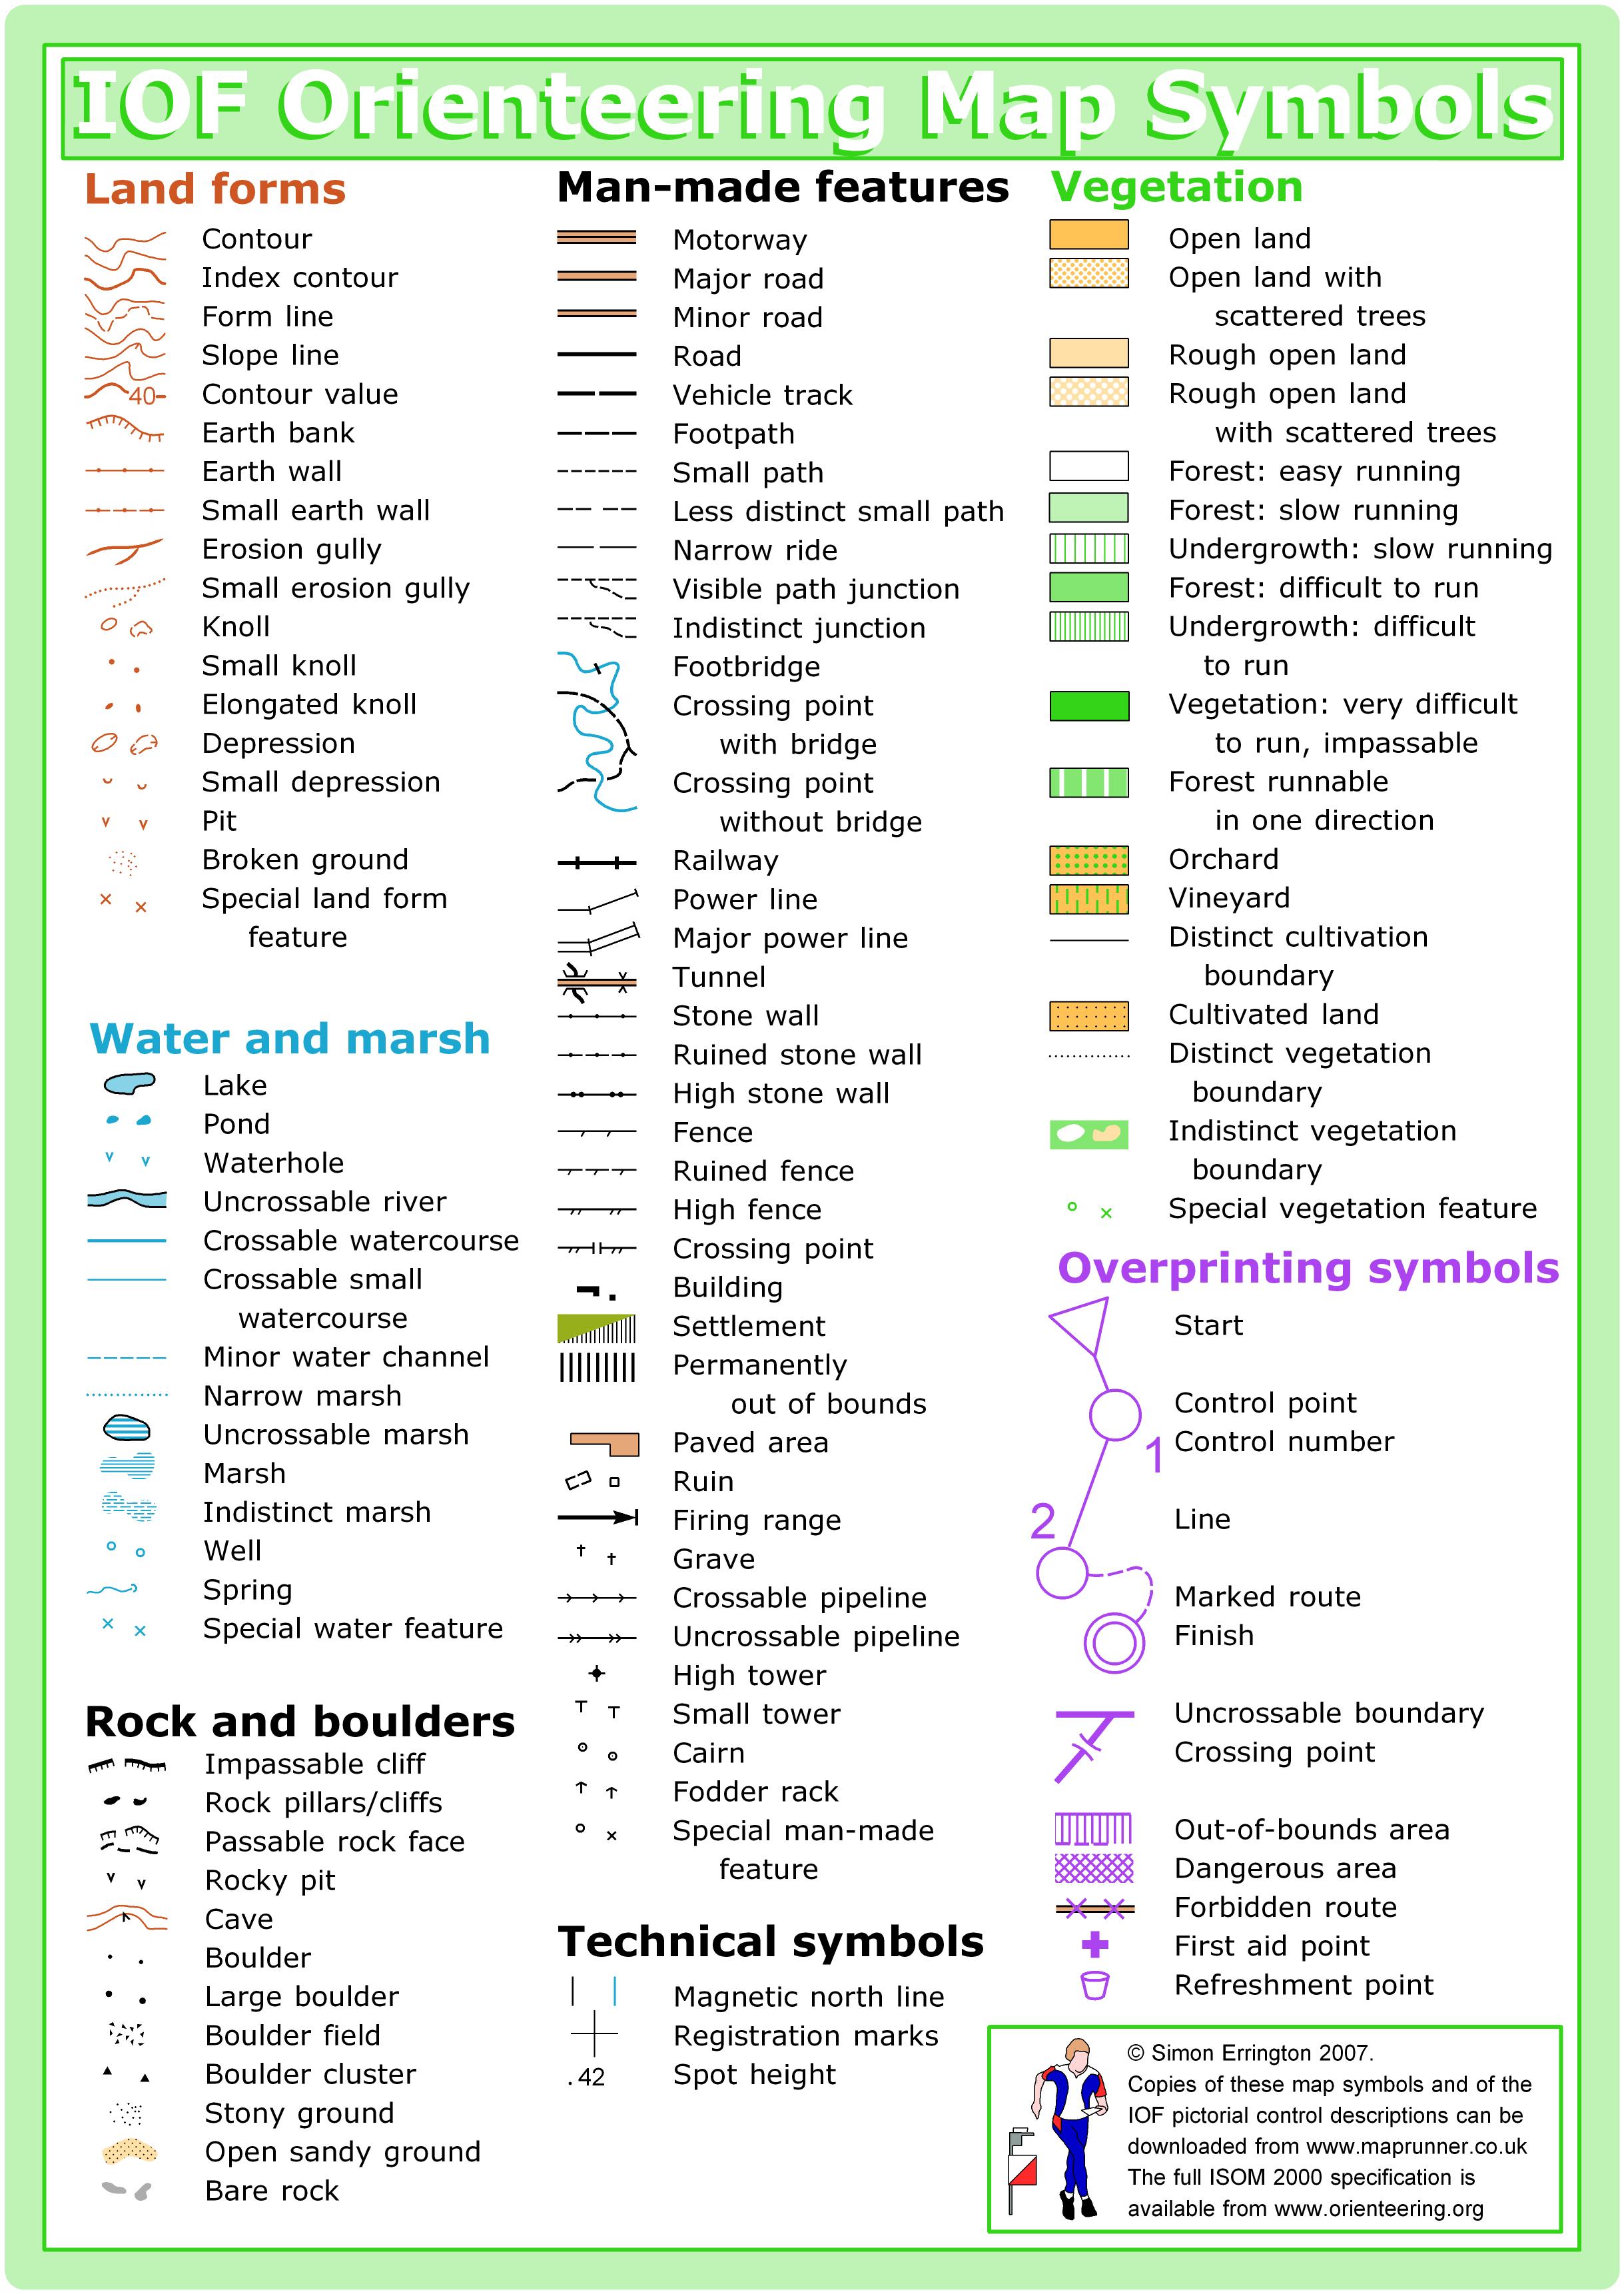
MAP LEGEND
Orienteering maps are very detailed! Learn about all the different colors and symbols that orienteering maps use.
![]()
CONTROL DESCRIPTIONS
Wondering what those hieroglyphics are? Check out the control description legend to learn how these symbols give you extra-precise information about the control you're looking for.